Code First Approach with ASP.NET MVC Framework
Code First Approach with ASP.NET MVC Framework
Introduction
This article shows how to create an ASP.NET MVC application using the Entity Framework Code First approach. This assumes no previous knowledge of the Entity Framework and it shows how to create MVC Application and to add Entity Framework to the project step by step.
Prerequisites
- SQL Server
- Visual Studio 2017
- ASP.NET MVC
Demo
Open Visual Studio, I have installed
Visual Studio 2017 Enterprise edition with version 15.8.1
Step 1
Go to File →
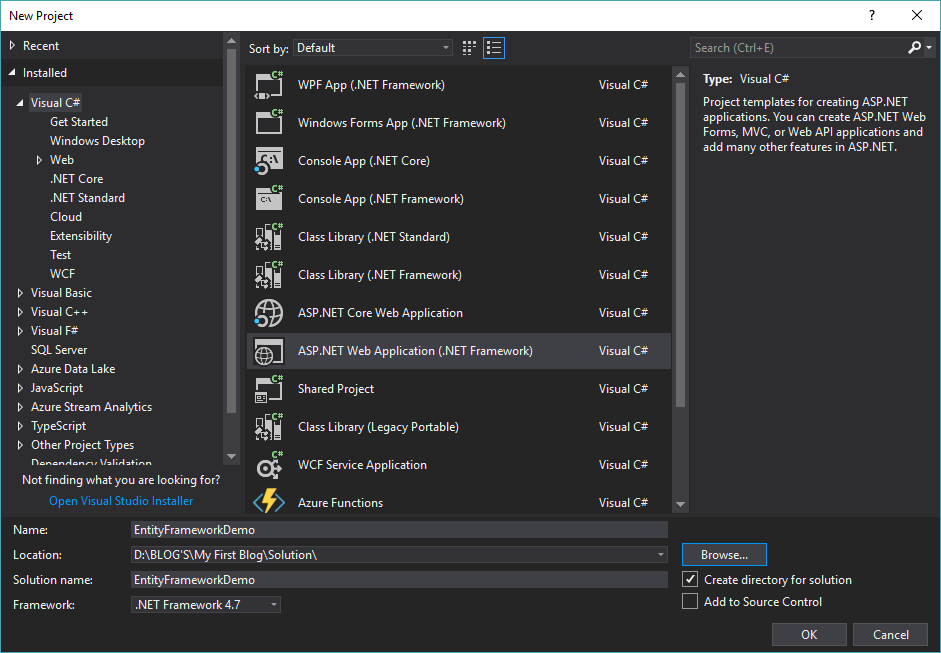
New →Project You will see the New Project Window below.
Select ASP.NET Web Application Project Template. Give it a name and a location
then Click OK. In this sample, I have created it as EntityFrameworkDemo.
 |
Step 2
Then, The below window will appear to you. Now You can select a project template to create an ASP.NET MVC application. Now, I'm going to select an ASP.NET Empty Template and Put a tick on the MVC check box. Then Click OK. Your "EntityFrameworkDemo" Project is Created now.
 |
Step 3
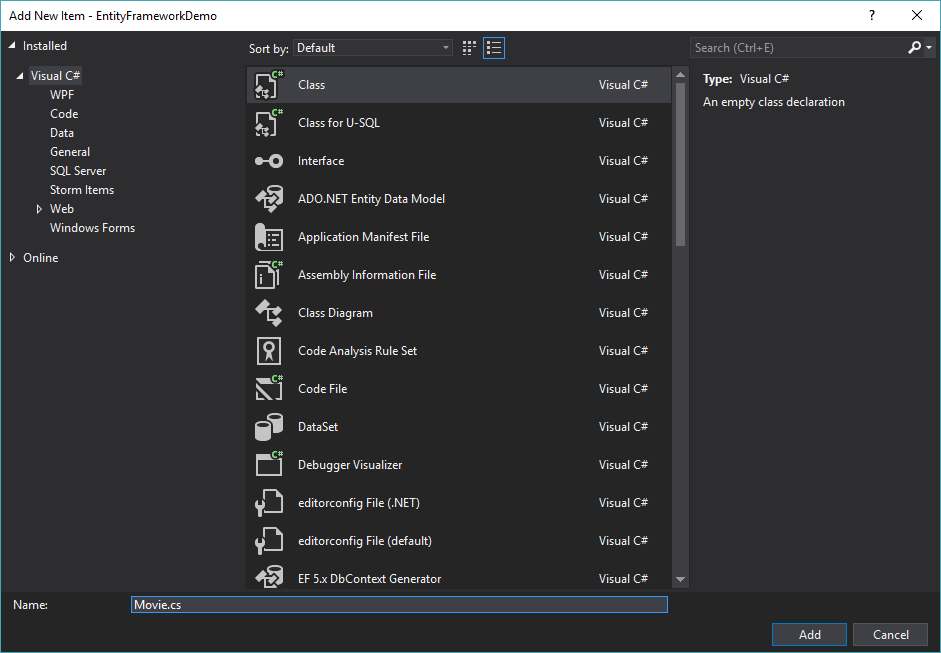
Now, We are going to Create a Movie Class.Right-click on Model Folder → Add → click on Class. In the Add New Item dialog box, Enter the class name "Movie" Then Click Add.
*Note: Pascal Casing for class names and method names.
Sometimes called "UpperCamelCase", or "DromedaryCase".
Step 4
Then, You Can See your Movie Class Created inside of the Model Folder. Now, Add Id, Name, and ReleaseYear Class Properties as shown below.
Step 5
Create Another Class inside of the Model Folder named "MovieDbContext"
Right-click on Model Folder → Add → click on Class. In the Add New Item dialog box, Enter the class name "MovieDbContext" Then click Add.
Step 6
Now, You need to install Entity Framework to your "EntityFrameworkDemo" Project.
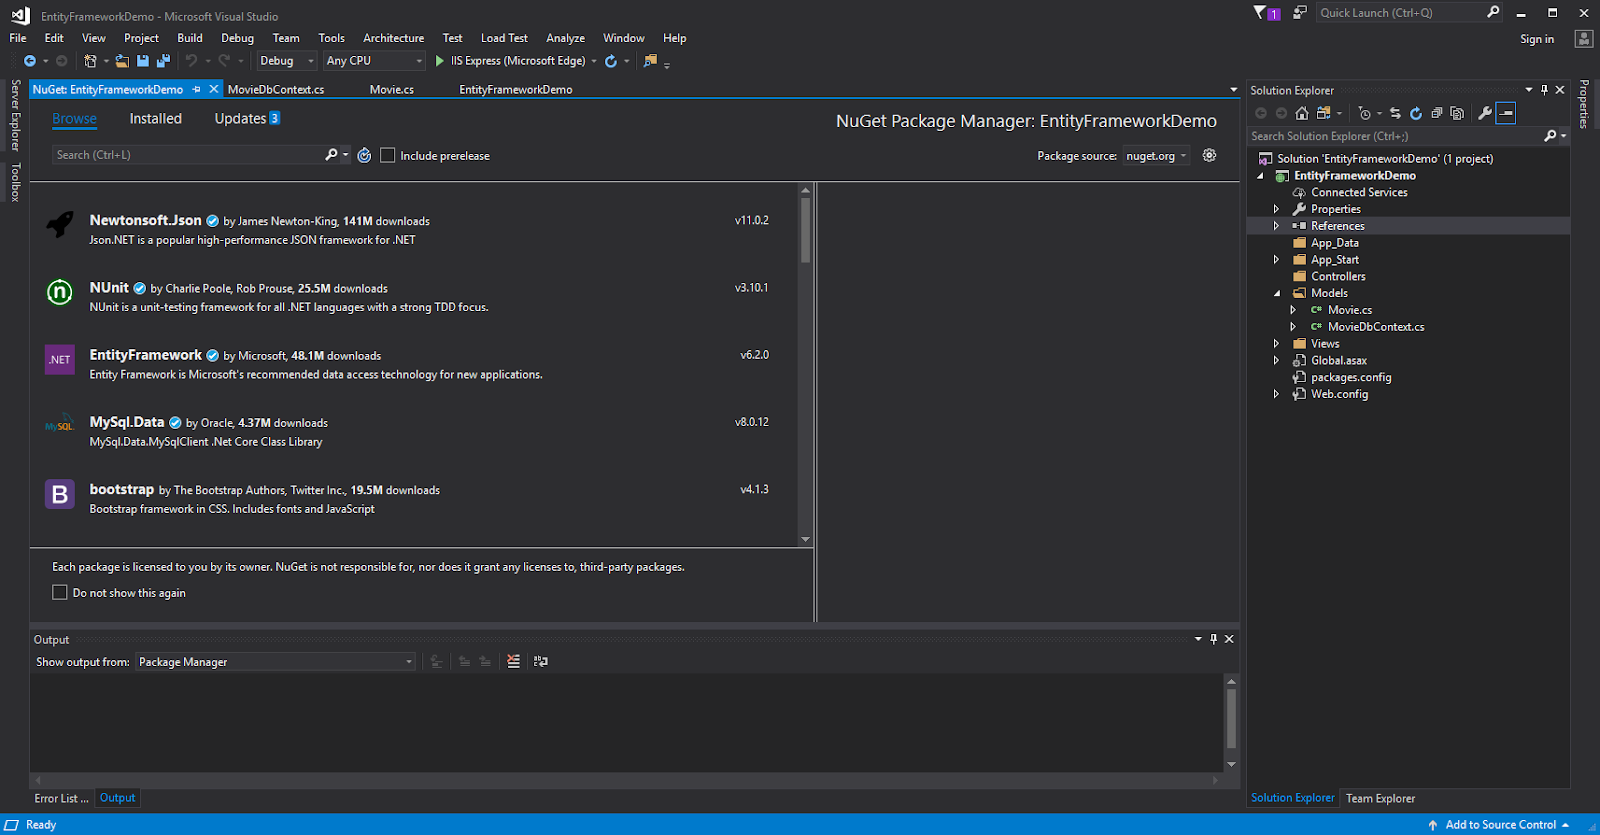
Go to Right Click on Reference Section → Manage Nuget Packages. You will be able to see the below Window.
Alternatively, you can also install the Nuget package using the Package Manager Console.
Go to Tools -> NuGet Package Manager -> Package Manager Console and Execute the following command to install Entity Framework
PM> Install-Package EntityFramework -Version 6.2.0
Step 7
Then this window will appear to you and can search "EntityFramework" and then you can Find the Framework as Shown below.
The preview Changes popup displays the list of packages that it is going to install in your application. Preview the changes and Click OK.
Finally, accept the license terms associated with the packages that are going to be installed click I Accept
Step 8
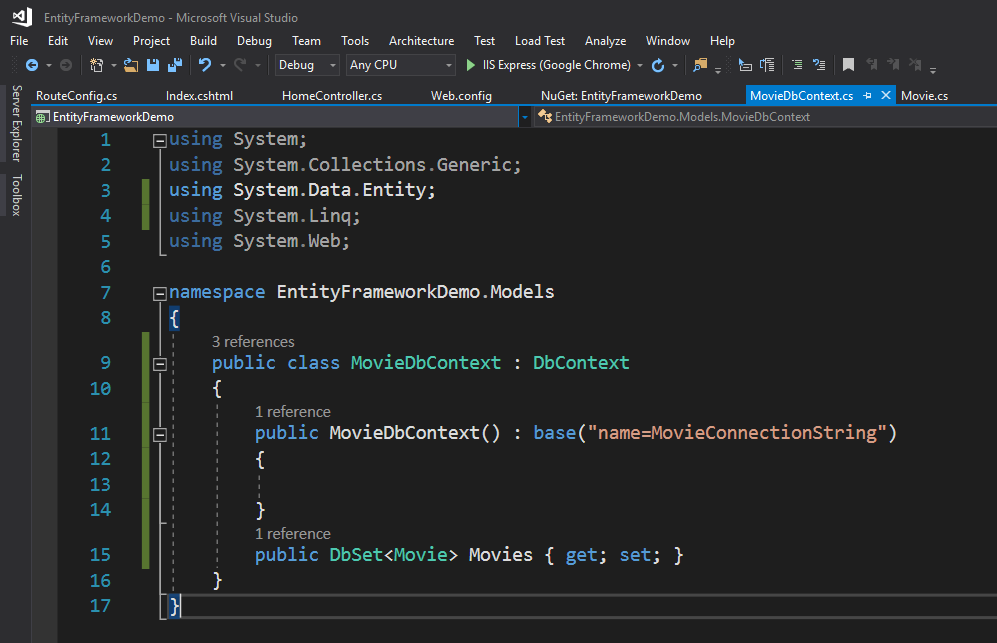
DbContext is an important class in Entity Framework. It is a bridge between your Model classes and the Database. DbContext is the primary class that is responsible for interacting with the database.
The following example of we are going to Create a "MovieDbContext" class context class that Derives from DbContext.
The following example of we are going to Create a "MovieDbContext" class context class that Derives from DbContext.
Step 9
The "DataSet" class represents an entity set that can be used for CRUD operations. The "MovieDbContext" context class (inherited from DbContext) must include the Dataset type properties for the entities that map to database tables and views.
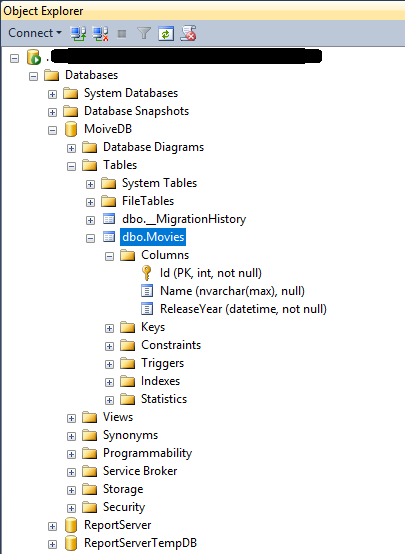
For example, In previous steps, we created a Movie Model. Now we need to create that Movie Model inside the database.
Step 10
Next, Add a Connection String inside the Web Config as shown below.Step 11
Then, you can also define the connection string in the web.config and specify the connection string name starting with "name=" in the base constructor of the context class. Consider the following example where we pass the "name=MovieConnectionString" parameter in the base constructor.Step 12
Now, We are going to Create a Controller inside the Controller Folder named "HomeController"
Now Right Click on Controller Folder → Add → click on Controller.
Step 13
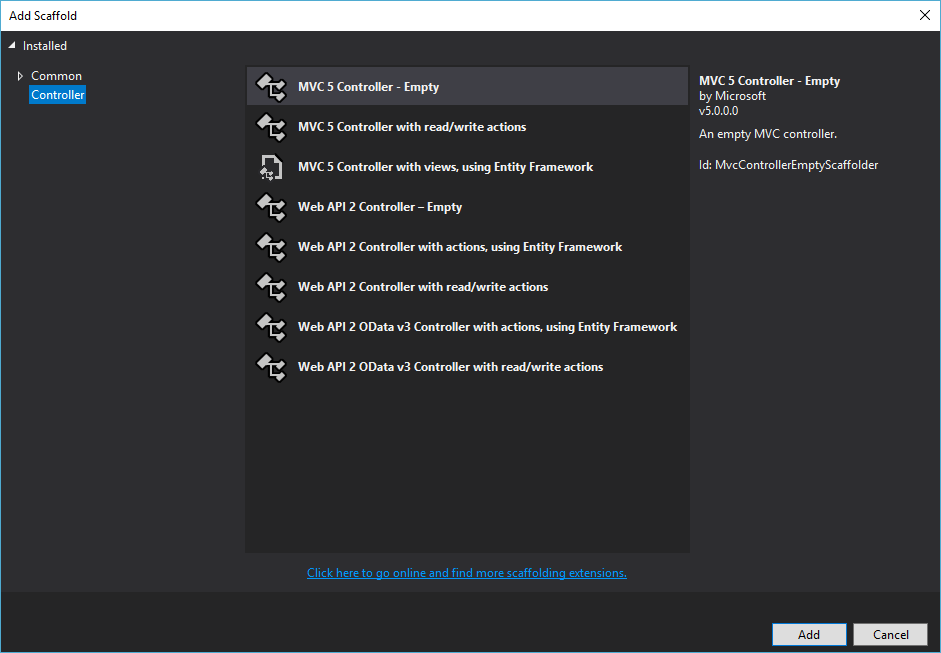
Then, In the Add Scaffold dialog box, Select "MVC 5 Controller - Empty". Then click Add.
Step 14
Now, In the Add Controller dialog box Enter the controller name as "HomeController".Then Click Add. Then, you can see inside the controller folder have created a new Controller as "HomeContoller".
Step 15
Step 16
In the Add View dialogue box, keep the view name as Index. It's good practice to keep the view name the same as the action method name so that you don't have to specify the view name explicitly in the action method while returning the view.
Step 17
Select the scaffolding template. Template drop-down will show default templates available for Create, Delete, Details, Edit, List or Empty view. Select the "List" template because we want to show a list of students in the view.







Comments
Post a Comment